
|
|
Already set a bookmark? |Tesla Coil| |
||||||||||||
|
|
|||||||||||||
|
|
Preface - Solid State Tesla Coil - 12V |
||
|
|||

|
|
The Control |
|
 |
||
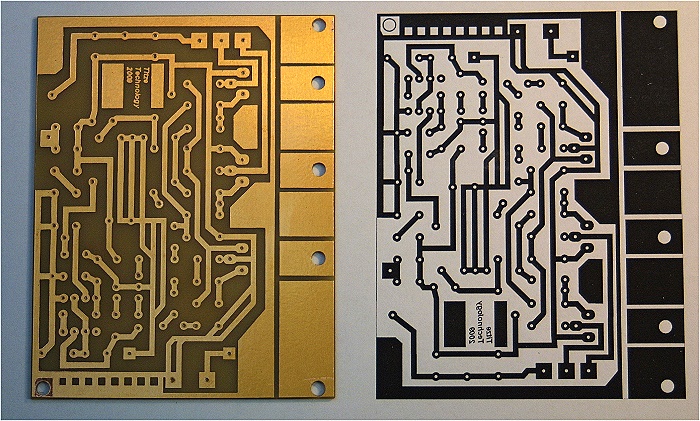
| Left the circuit board after etching and on the
right side the positive photo-resist. I have the connection diagram and the layout for the control of the SSTC from the following website: http://skory.gylcomp.hu/tesla/mini_tesla.html At first go all to be ok and i doesn´t destroy any parts of this (particularly with MOSFET). It is a very good solid circuit. And here there is the layout as pdf file to download |
||
 |
||
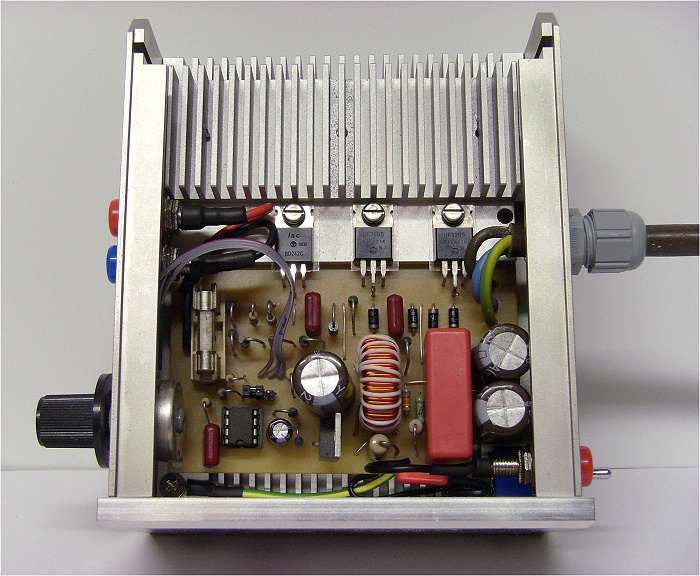
| The finished circuit from the SSTC in a opening housing. On the right side is a switch to control the secondary coil (oscillating circuit), because i used the Tesla Coil with and without Toroid. So i must change the resonance frequency for it. | ||
 |
||
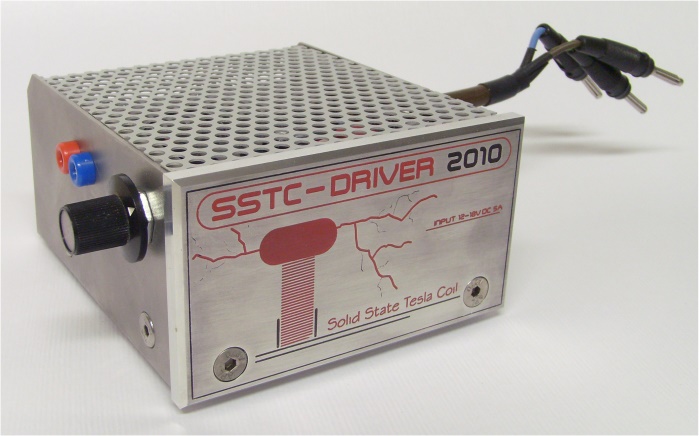
| On the left the power connection for 12V d.c. voltage, maximum current is 5 Ampere. So approx. 0.7 to 4A flows depending upon adjusted clock frequency (potentiometer). With the clock frequency stops the number of sparks per second. This is comparable with amplitude modulation. | ||
 |
||
| Back view with the over size heat sink. Left the connectors to the primary coil. | ||

|
|
The Coil |
|
 |
||
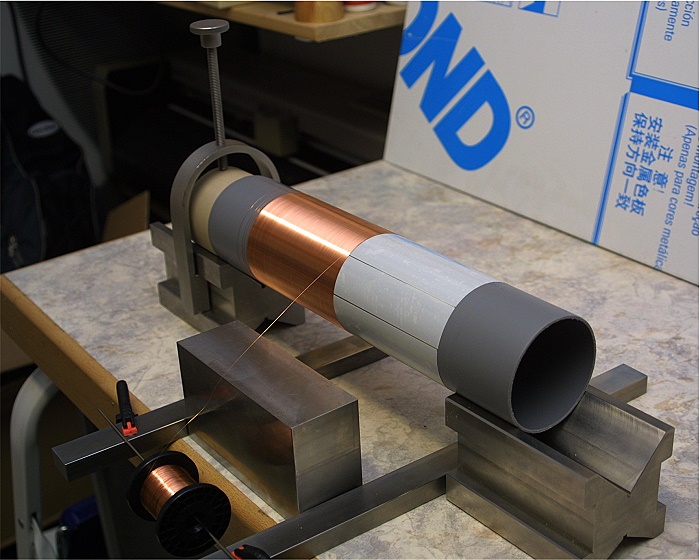
| To spool i used a PVC drain pipe with a diameter of 75mm. The wire ( lacquer-coated wire) has a diameter of 0,15mm and is provided with 1400 turns. That results in a coil length of 210mm. The relationship diameter to length is thus nearly the ideal value of 1:3. And in 3-4 hours one already created the winding of the coil: -) | ||
 |
||
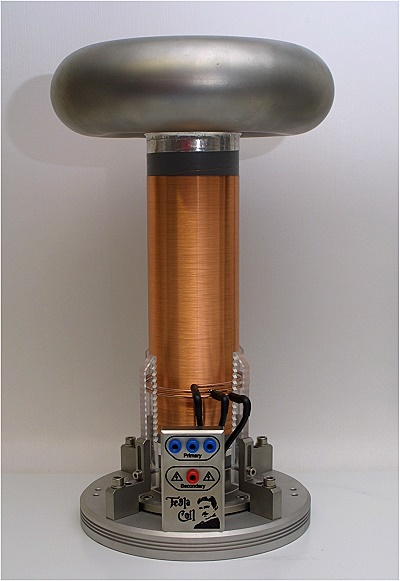
| The finished developed Tesla coil with a resonance
of 235KHz with installed Toroid and 335KHz without Toroid. Thus arise for the resonant circuit: 33µH with 20nF with Toroid (Top load) and 33µH with 10nF without Toroid. I used two condensers of each 10nF, which over a switch is parallel switched. So I can use the Tesla coil with or without Toroid. |
||
 |
||
| The primary coil consists of two turns moving in opposite directions (diameter 3mm copper) and is naturally height adjustable. It´s only allways one of the booth turns in use. Thus those lets the full operating tension use of 12V. | ||
  |
||
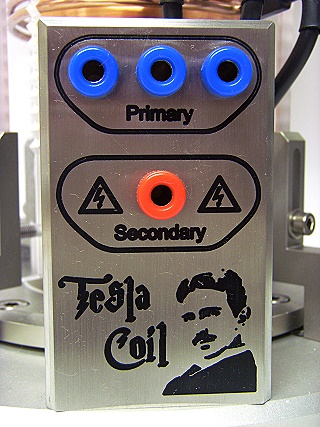
| The connecting kit with the engraved portrait of the inventor Nikola Tesla. | ||
|
|
In Use |
|
 |
||
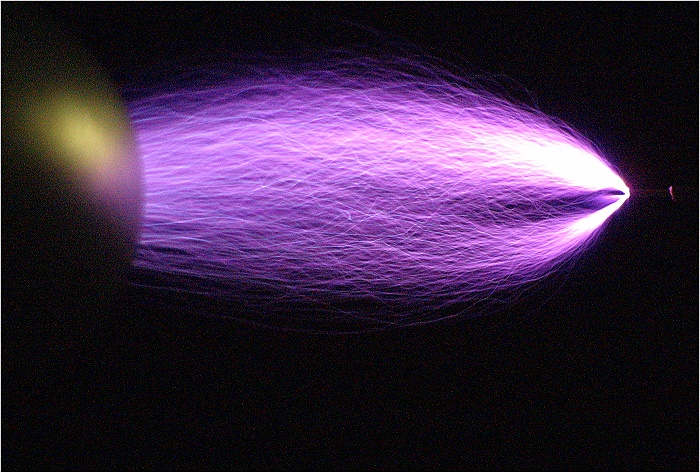
| The coil runs by a Lead rechargeable battery 12V. In the best case scenario I reached sparks over 10cm. if we could assume that: per 1mm corresponds 1000V then that we come up to 100,000 V. Full power :-) | ||
 |
||
| With longer exposure time comes to amazing effects. At all the photos look better than in the reality. | ||
 |
||
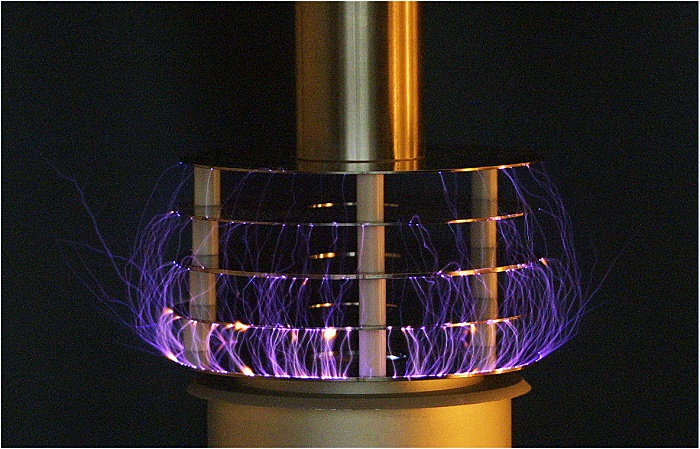
| Spark discharges on the Toroid. | ||
 |
||
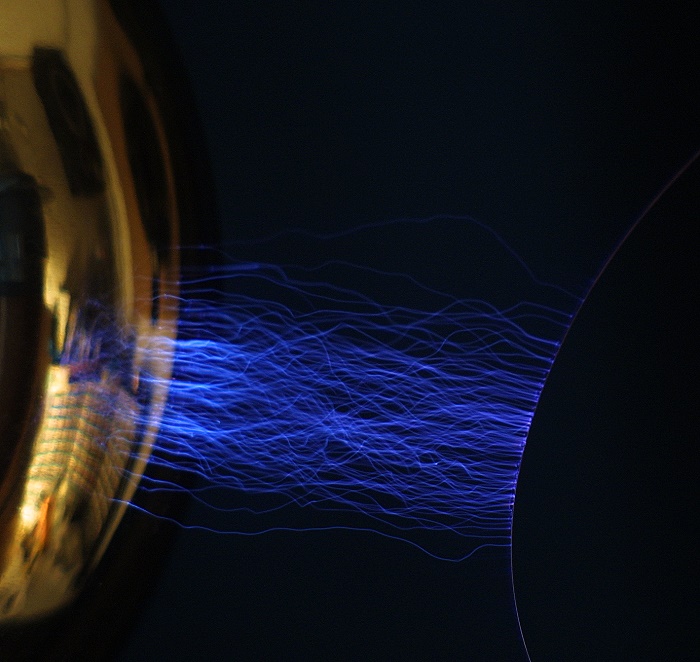
| With longer exposure time and with a grounded copper-wire fast drawn back and forth. | ||
 |
||
| Beautifully. Corona discharges at a twisted copper-wire. | ||
 |
||
| And once more. | ||
 |
||
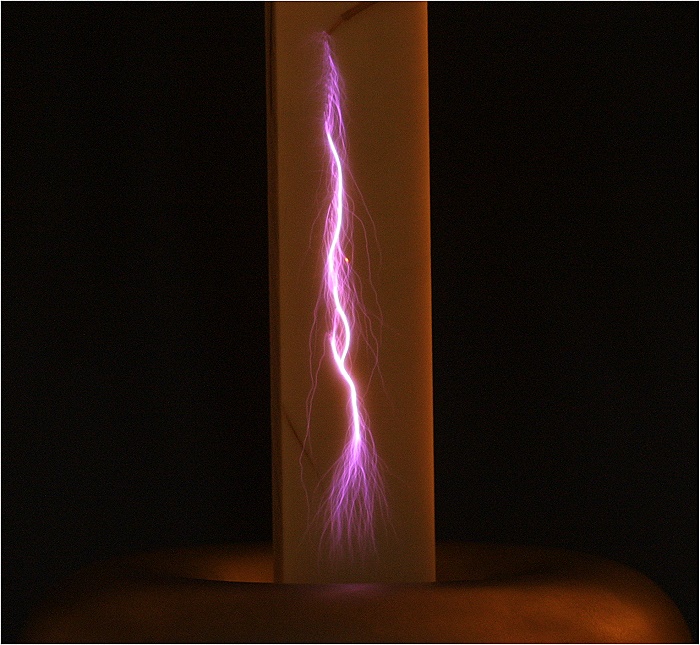
| Any nice effects can be generated at plastic surfaces. | ||
 |
||
| Above with the wire back and forth pulled also mad effects result in. | ||
 |
||
| Stressed CPU. | ||
 |
||
| That CPU has a little bug now. | ||
 |
||
| Air discharges | ||
 |
||
| Discs of an old hard drive. | ||
 |
||
| Only one disc. | ||
 |
||
| Here a wire against a chromed steel ball. | ||
 |
||
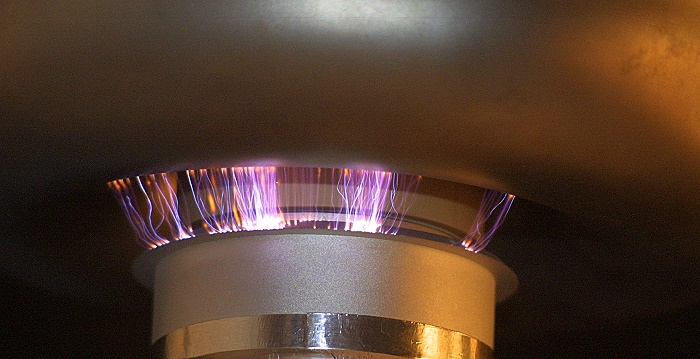
| Now the Toroid is isulated to the secondary coil. | ||
 |
||
| Graphic card: Test of the extra class! | ||
 |
||
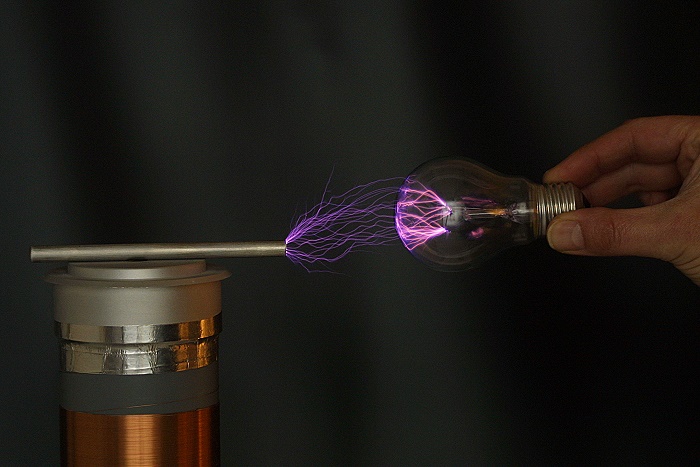
| The good old Edison bulb is to be used as a plasma ball. | ||
 |
||
| Plasma ball | ||
 |
||
| And everything shines, in order to approximately come into the vicinity of the SSTC. | ||
|
|
Mr. 1.000.000 Volt |
|
 |
||
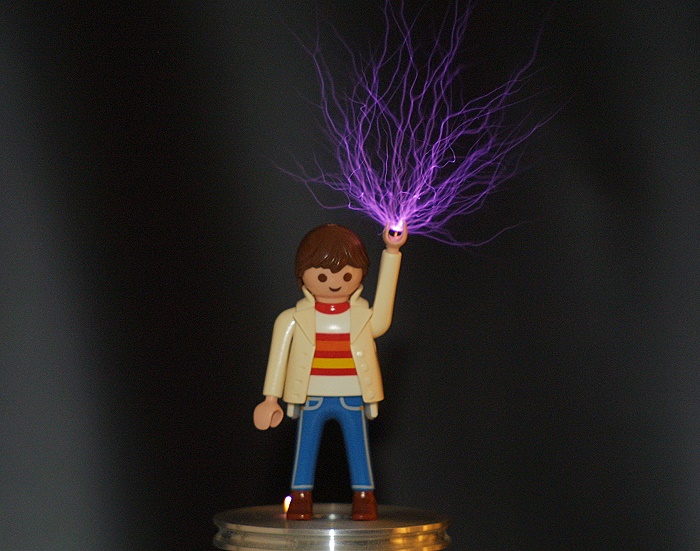
| Corona discharge out of the hand from Mr. Sparkman. | ||
 |
||
| An energy-saving lamp begins to shine. | ||
 |
||
| Does not shine more brightly. | ||
 |
||
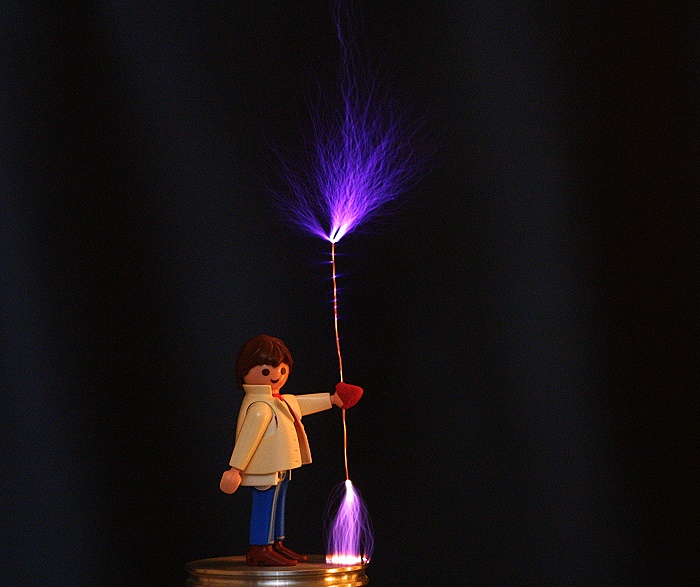
| Braggart! | ||
 |
||
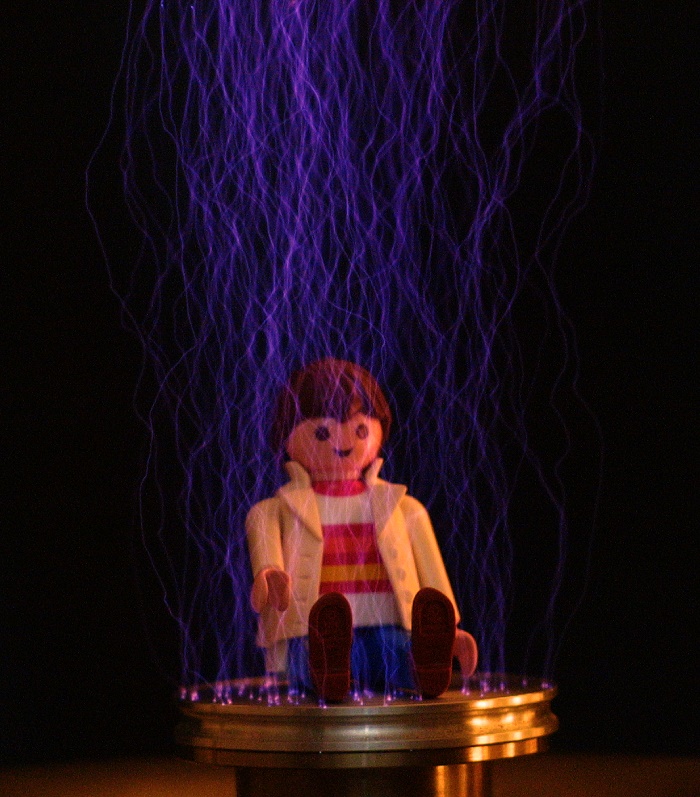
| A faraday cage protect him. | ||
 |
||
| Electron shower | ||
|
|
Video |
|
|
|
||
|
|
Already set a bookmark? |Tesla Coil| |
||||||||||||
|
|
|||||||||||||
Fatal error: Uncaught Error: Call to undefined function mysql_connect() in /www/htdocs/w00cc458/php_kommentar/vionlink_comments/db_vbdg.php:32 Stack trace: #0 /www/htdocs/w00cc458/projekte/tesla/english.html(657): include() #1 {main} thrown in /www/htdocs/w00cc458/php_kommentar/vionlink_comments/db_vbdg.php on line 32